Showing posts with label my creative space. Show all posts

Thursday, April 26, 2012

my creative space: school books

Well my big 5 year old is on to day 3 of school today and wow it has been busy! My fantasy of life getting a bit easier with one at school has been completely turned on its head... getting two, sometimes three kids out the door before the 9am drop off and back at 3 has been a real challenge for me so far! Jack's afternoon sleeps have had to completely change and I actually think I am going to have less time not more because of that! School is going great though and she is very happy so that's good and I'm sure once I get used to it all things will settle down a bit (I hope!)
Anyway, on to my creative space- this was something I did last week that was soooo enjoyable- covering school books. Yes I hear you say - how can that be enjoyable but I really did enjoy doing this- probably helped that I set my little space up with a coffee and the sky remote too!
I had been thinking about how to cover Amelie's school books for a while as I love the creative aspect of this (any excuse to get a bit crafty) and the novelty of covering school books for the first time. I was actually going to cover them in fabric after seeing these great posts from Cotton Kiwi and Ruby in the Dust.

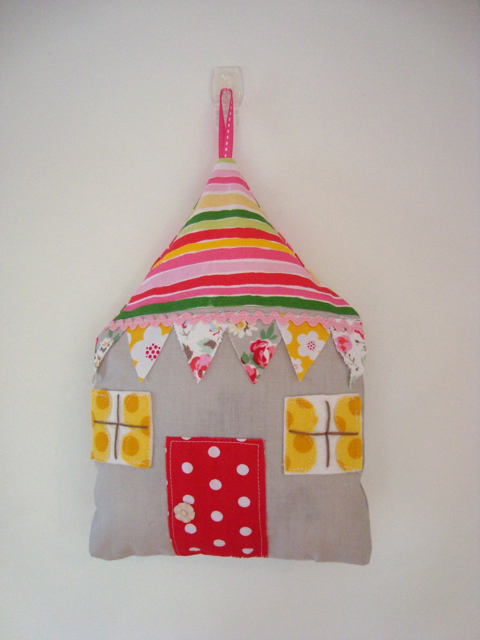
http://cottonkiwi.blogspot.co.nz/2012/02/back-to-school-fabric-covered-exercise.html
http://rubyinthedustdolls.blogspot.co.nz/2012/02/covered.html

But then I saw some book covers on the amazing Facebook page of Fairy Dust Stationery. Toni designed and printed out her own covers for her daughters school books and folders and covered them with clear duraseal.  I thought this was such a great idea as well - duraseal is not very eco-friendly but having seen how school books get treated it does appeal to keep the books in tact and waterproof! (I used to teach kids who had books covered in wallpaper which looked really great but didn't last long- it would end up ripped and tattered really quickly.) And I loved the idea of designing covers with her name and colours and pictures that I knew Amelie would like.

But life got a bit busy and then I had a brainwave- using my stash of scrapbooking and art paper and card that I have been collecting for ever.  I keep everything for my art/card stash- invitations, cards, packaging, magazine pictures, paint sample cards...anything that catches my eye really.

So in the end I chose some of the papers and card that I knew she would like,  cut them to fit the different school books and stuck them on using a glue stick (I only covered the front of the school books). Then I covered the whole book with clear duraseal. I had 6 books to do and all up this only took me less than an hour.  I also added cute stickers to some of the books and the name labels from Stuck On You (thanks for the advice re: school labels on my facebook page) before covering with the duraseal.
For one of the books I had fun doing a bit of 'patchwork'...
and for one I had this collage picture in my stash that I made about 4 years ago and had never framed so on it went!
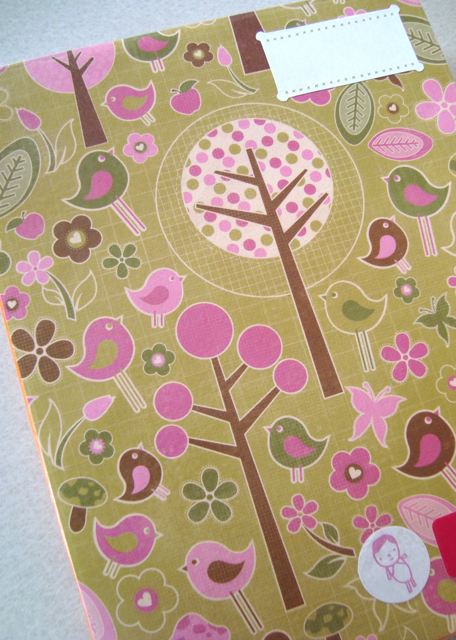
I couldn't label the books for each subject as I wasn't sure what each book was going to be for so I added a blank label sticker to the top of each book after covering them.  I got the labels from this gorgeous sticker book "Crafty Stickers" from Book Depository. 
Another fun idea would be to use your children's art works or get them to design their own covers for each book if they're a bit older or use photo's- cut them to fit the book and cover with the clear duraseal- they would love that I'm sure. I still love the fabric idea as well so will keep that in mind for other things like having a special writing or drawing book for home maybe.
And I have to share this great tip from my friend Kylie for school- keep a jar with coins in it - because if you are anything like me you will never have cash in your wallet and there is always something your child will need $$ for school- mufti days, shows, trips, fundraisers etc. And they'll tell you just as you're leaving the house in the morning!
And thank you for all the great ideas about meal planning in my last post Organised Home Challenge: Meal Planning. Using random.org the winner of the tea towel set is Number 10- Miriam! Email me your address Miriam and I'll post the tea towels to you :)
For more creative spaces click here
Megan x

Thursday, February 23, 2012

my creative space: a fabric bookmark

Finally a creative space post- a little something I made the other evening for my nearly 5 year old Amelie. I have been really looking forward to reading chapter books with Amelie so I thought I'd make a little fabric bookmark to mark the occasion so to speak!  I received this amazing bag of scrap fabric from Nin last week as part of her 'Scrap Bag Swap'- what a treat to go through all the gorgeous fabrics.
Amelie and I had heaps of fun choosing our favourites- there was some debate going on in regards to some of the fabrics that we both wanted for our stash's (yes Amelie has a stash already ;) so I used some of the fabrics she chose for the front of the book mark...
..and this beautiful yellow fabric for the back- we both love this fabric :)
Thank you so much again Nin for the fabric, and for organising such a great swap. Check out Nin's blog as she has made a Scrap Bag Swap Tutorial page - there are lots of great ideas for things to do with fabric scraps.

I made a pile of the chapter books I want to read with Amelie first- most of them from when I was a child hence the tattered look of them! The only one missing is Pippi Longstocking which I will need to buy as that is one of my favourite books- I have very happy memories reading about Pippi's adventures.
Here's my list if you are wanting some ideas for chapter books for your children...
And just had to share this- if you are wanting something to keep the kiddies amused for a while- read them this picture book...
then give them a basket tied onto a rope and loop it over something like this or a tree branch and show them how to pull the basket up and down like a pulley just like in the story. The girls spent nearly an hour (honestly!) filling up the baskets and pulling them up and down!!
Would love to hear of your favourite children's novels or authors :)
For more creative spaces click here
Megan x

Thursday, June 9, 2011

my creative space: a little house

I finally got my hands on a copy of the book "Scandinavian Stitches" by Kajsa Wikman, from our local library.
I've seen this book on lots of blogs and it is just gorgeous with heaps of cute projects, my favourite being the little houses.  I was even lucky enough to receive a house from Leonie as part of the kiwi christmas ornament swap which is now on my notice board in my craft space.
So I made a little house for my kitchen, just a bit bigger than the one in the book.
Kajsa's blog is so beautiful and inspiring too- check it out here http://syko.typepad.com/, her facebook page here www.facebook.com/sykodesign and take a look at some of the things in her Etsy shop- how cute is this little village!
 My village - a collection of 10 soft houses
Love machine - art print

For more creative spaces, head on over to Our Creative Spaces here
Megan x

Thursday, May 19, 2011

my creative space: a baby blanket/playmat

I made my first little baby blanket/playmat this week for Jack- he needed one as we only had one blanket that wasn't pink! I've been wanting to make a little quilt for ages after seeing this gorgeous one made by Joanna at Little Minx from this great tutorial from Cat Taylor.  I made my blanket smaller though so I could use it in the capsule or buggy or as a little playmat.
For the patchwork top I used some Michael Miller zoology fabric that I bought from Bernina before Jack was born and I got the other two fabrics and the printed flannel for the back of the blanket from the new Spotlight store that's opened here in Tauranga....definitely my new favourite store...I may have actually taken Jack there 4 times in the last week - he is getting well known as the baby with all the hair! 
For the blanket inner I used some 'needled cotton' (I'd never heard of that before but a lady at Spotlight recommended it and it's lovely and warm without being bulky which is good for taking out and about).
The best thing about this blanket is that it was surprisingly quick to make (seriously!!)  Cutting out the squares didn't take long at all (there's only 16 squares on my blanket) so I did that one evening once Jack was in bed, and then sewing the patchwork top and then the layers together only took about an hour all up. It was great using my walking foot too as it made it really easy to keep the layers together.
You know what it's like when you make something new and you just want to make heaps more! The girls want one each now too so I thought I'd make them little lap quilts a bit bigger than Jack's.

And check out these pants that my friend Rosie made for Jack in the same animal fabric- aren't they cute! She used a pattern from Anna Marie Horners "Handmade beginnings' book and lined them with flannel so they are super soft and snuggly. Thanks again Rosie :)
For more creative spaces check out the new Our Creative Spaces page that Kirsty from Kootoyoo has put together here.
Megan x

Friday, March 25, 2011

my creative space: a busy book

I should start this post with a warning....this is a crafty project that is very addictive and can end up consuming quite a lot of your thoughts and time!
I've been wanting to make a fabric 'busy book' (they're also called 'quiet books') for ages now and decided to get going and make one for Stella's birthday. She is, like a lot of 2 year olds, obsessed with clips so I thought she'd love a book with lots of different fasteners like zips, buttons and clips to play with.  But once I got started I realised I had no chance of getting it finished in time for her birthday so I've decided to just work on it whenever I get a chance and give it to both girls when it's finished.
I've made three pages so far (with a few more nearly finished) so I thought I'd share them today and share the rest as I finish more. I got heaps of ideas from this blog http://quietbook.blogspot.com which has links to lots of other busy books. And these quiet books were also very inspiring http://thethornocks.blogspot.com/2008/12/quiet-encyclopedia.html and http://homemadebyjill.blogspot.com/2009/06/finished-quiet-book.html

One of the good things about this project is that if you're a bit of a crafter you can find heaps of things to use from your craft supplies and fabric stash and other things around the house so you don't need to buy much to make it. These books are also great for developing fine motor skills, and your imagination is the limit as to what other things you can teach using the book, eg: colours, shapes, counting, alphabet etc. A lot of the crafters that made the books I've seen on blogs were inspired by their own mum's fabric books so it's pretty neat to think that maybe it'll be a book that future grandkids might play with too!

So here's the first page I made... I found this alphabet ribbon among my ribbon stash so I stitched it on and added a little duck bead on some thread so the girls could practice spelling their names and recognising letters.  Next I threaded some beads on a ribbon for some counting practice,  and the little lion slides along the spotty ribbon just for fun! I made the lion from the book "Felties" about a year ago and have had it on my noticeboard just waiting for a project like this!
Next I made Stella's 'clip page'- just need her to learn how to undo the clips now as well!
I saw the idea for this 'puzzle block' page somewhere in blogland but when my hard drive crashed I lost all my links and I can't for the life of me find where I originally saw it. If you think you know where the idea came from please let me know and I'll link back to it. This was a pretty quick page to make as it's all made from felt. I just cut out a whole lot of the same size squares and then played around cutting them into a few different shapes. The part that took the longest was probably stitching on the little flower buttons! My nearly 4 year old played with this page for nearly half an hour when I finished it so it's definitely a winner!
I made a zip pocket on another page to keep all the pieces in.
If you know of any links to some great busy/quiet books you've seen or have made yourself I'd love to see them.

A big thank you today as well as to Wendyl Nissen for featuring my blog, along with this lovely one, in her email newsletter this week. I think I've read every newsletter she's written since she started out on her 'Green Goddess' journey so it was very exciting to see my name in her latest one. You can read it here, and if you're wanting to get a weekly dose of  Wendyl's "It's okay to be a Nana" inspiration, sign up to her newsletter on her home page here.

And musn't forget... the winner of the eco-friendly cleaning goodies from last week's challenge is Leonie
Congratulations Leonie, hope you enjoy your treats, and thank you so much everyone for your comments and tips- I can't wait to get into making some more products now. And wasn't it neat to see that your comments made Wendyl's day!

For more creative spaces this week, visit Kootoyoo here

Thanks for visiting,
Megan x

Thursday, March 17, 2011

my creative space: handprint embroidery

I came across this idea on this lovely blog last year and have been wanting to make our own family one for ages. I've made it as a little art work for the baby's room so when he/she is born I can add their little handprint too!
It was pretty quick to do- I drew around each of our hands on card and then cut out each outline, then I traced around each hand on the fabric using a water/fade marker pen and stitched each handprint using backstitch.
If I was doing this again though I would just trace and stitch one hand at a time- I got a bit confused with all the lines and ended up having to unpick a bit!

It only took a couple of evenings in front of the TV to stitch the handprints and the girls, especially Amelie, thought it was pretty neat when finished. Kids love drawing and seeing their handprints don't they!
And now some questions for you crafty people- I have seen lots of blogs with crochet or knitted dishcloths/wash cloths and would love to have a go at making some for the kitchen (have never used them before). Are they just like using a kitchen sponge- so you use them for wiping the bench, high chair etc?  Does anyone have any links to their own dishcloths on their blogs or know of any links to nice and easy crochet dishcloth patterns? I've searched a few but I thought I would ask here too :)

Thanks heaps, and for more creative space today visit Kootoyoo here
Megan x

Thursday, March 10, 2011

my creative space: a patchwork chair

I've had this chair that I bought off Trade Me sitting in our garage since we moved into our house three years ago.
We used to live in a 1930's bungalow which I decorated in a bit of a shabby chic/Cath Kidston style so this chair looked great in our hallway with some fabric from Kate Fitzpatrick. But it didn't really suit the house we live in now, plus there wasn't really anywhere to put it, so it's been out in the garage gathering dust.
But after seeing this chair on the gorgeous blog Lucy and I (thanks for telling me about this blog Saskia if you are reading this!) I decided to have a go at a very small patchwork furniture project with the chair.
I also saw this yellow chair last year on Abby's blog and it just stuck in my head as a great little project.

First off I sanded it and painted it Resene "Sargent Pepper". (I love this colour- I think it's quite similar to Pantone's Colour of 2011
Pantone Color of the Year 2011: Honeysuckle


I'm not very good at measuring before I make stuff (a bit like pinning which I have to force myself to do when I'm sewing too!) so for the seat I just cut out a square from some card for a template, worked out roughly how many I would need to cover the chair seat, then cut out a whole lot of squares from my chosen fabrics, then cut some of the squares in half to make some rectangles. Then I just played around and stitched rows of them together and crossed my fingers it would fit over the seat! I used a staple gun to attach the fabric to the seat -nice and quick!
I've put it in Amelie's room next to her bed- a good place for her to put her books and all the other random stuff she likes to take to bed most nights!
To see what's been happening in other creative spaces this week, visit Kirsty's at Kootoyoo here
Thanks for visiting :)
Megan x

Thursday, March 3, 2011

my creative space: Little Red Riding Hood

I saw this lovely old book at my mother in law's in the weekend- a gorgeous version of the classic Little Red Riding Hood story. Amelie loves reading it and dressing up as red riding hood- I bought her a basket from the Salvation Army store and she even made me dress up as the wolf with some brown fur fabric I bought last year to make baby blankets- funny what you get up to in a day sometimes!
I love this little cottage
Stella thinks that she's the little girl in the book and says "La La' very excitedly when she sees it :)
If you're wondering what this has to do with 'my creative space' I've had some Stitchbird little red riding hood fabric for ages now and as I had a couple of presents to make for two 4 year old girls last week I used some of it (along with some 'Katie Rose' fabric) to make two little satchel bags.
And keeping to my red riding hood theme I found this tutorial for a little doll that I'd like to make one day
little-red-riding-hood-doll
And how sweet is this birthday card from Bee at Honeyjumble
Little Red greeting card
Have you seen this amazing RRH pop up book illustrated by Louise Rowe? I found it via this post at weheartbooks 

Here's a lovely version of the story from Oxbridge Baby on youtube too...
For more creative spaces, visit Kirsty's here
Megan x
Related Posts with Thumbnails