Tuesday, November 22, 2011

Christmas busy book pages

When I was teaching there were quite a few of us that made two lists on the board with "Must do's" and "Can do's"- generally on a Friday with tasks and activities that the children needed to get done and a few things they could do when finished.  I think I need to write one of those lists as I am really good at doing things on my "can do" list- crafting, making stuff, more crafting but not so good on the 'must do's"- cleaning, cooking and other jobs- as I'm sure a lot of you crafters can relate! I have quite a few things on my 'must do' list at the moment but instead of doing some of them last night I decided I really wanted to make some more busy book pages. My hubby actually asked when I was going to be finished with the busy book but I honestly can't imagine finishing it- I think of pages I would like to make all the time!  So here are my latest pages...
Page 1: Decorate the christmas tree with little felt ornaments and thread the ric-rac through the loops to make a garland 
Page 2: a zip pocket to store the felt decorations and four 'lift the flap' presents with pictures underneath (from the Maisy fabric I also used for my roll-up busy book). 
Right, better go and do a few 'must do's' now before Jack wakes up!
Megan x

Monday, November 21, 2011

Picture books on youtube

My laptop sits on the kitchen bench most days. This is where the kids also sit for 3 meals and morning/afternoon tea most days and where they sit waiting (ever so patiently ha!) for what ever meal is coming their way next. So somedays these links on youtube and the associated 5 minutes of peace I get are just too good not to share. Some aren't the best quality but my kids (aged 2 and 4) enjoy them anyway. Hope yours enjoy them too :)

We're going on a bear hunt by Michael Rosen and Helen Oxenbury
Owl babies by Martin Waddell
Peter Rabbit by Beatrix Potter
The Wonky Donkey by Craig Smith
Hairy Maclary by Lynley Dodd
Harry the Dirty Dog by Gene Zion
The Mixed Up Chameleon by Eric Carle
The Tiny Seed by Eric Carle

And this is a funny one a friend shared on facebook- my 4 year old loved it but my 2 year old wasn't so sure! 
Sesame St lullabies. 
Would love to hear of more if you have any links to share.
Megan x

Friday, November 11, 2011

i ♥ colour

I've been checking out some of my favourite online shops lately getting a few ideas for christmas pressies- I am loving all these colourful goodies so I thought I'd share them with you!

Kikki-k diary gift pack

Envirosax bag from Green with Envy

Skip Hop kids cup from Yum Yum Kids

Babushka fairy lights from Kid Republic

Robot from Kid Republic
Apple Shadow Box
Apple shadow box display shelf from Candy Stripe Cloud

Cath Kidston Vintage Rose  Canister Set
Cath Kidston vintage rose canister set from Lark
Orla Kiely Hard Bound Journal A6
Orla Kiely journal from Small Acorns

And if you are a Bay of Plenty local and a big fan of colour and music head along to the incredible musical 'Colourful Soul' on now at the Mount Performing Arts Centre for 2 more nights- tonight and tomorrow night.  Check out www.colourfulsoul.co.nz or www.facebook.com/ColourfulSoul
An amazing show featuring some very talented locals! http://www.bayofplentytimes.co.nz/news/colourful-show-worth-look/1168623/

Megan x

Wednesday, November 2, 2011

My creative space: a roll up busy book

 
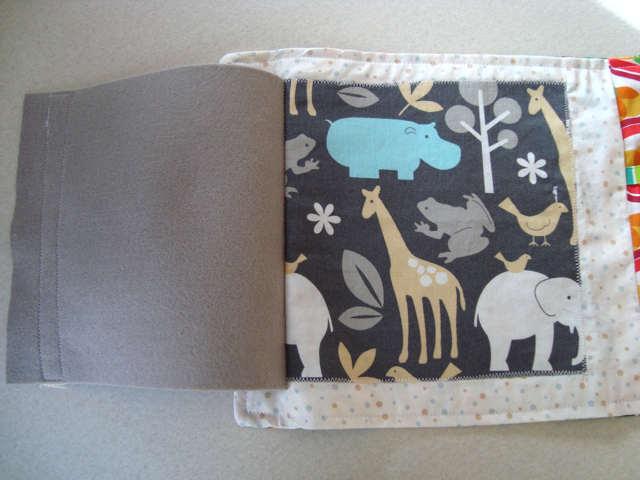
Isn't it great having crafty friends to get cool ideas from? My friend Krista gave me this idea to make a roll up busy book as she was making a neat panel style book for a little girl to play with in the car. So I thought I would make something similar for a 1 year old but make it so it can be laid out on the floor to play with and then rolled up when finished with. And other than cutting out the 8 squares for the book the whole thing only took just over an hour to sew together- I did do pretty simple pages though! I sewed the front four panels together and then the back four panels together, then placed the 2 panels right side to right side and sewed around the whole book leaving a small gap for turning right side out (and popping in a little yellow flap), then top stitched around it.
For the first page I appliqued some animal print fabric and added a felt flap...
A clip for the second page...
Some cute Maisy fabric for the third page with some beads to play with...
 
and some taggie ribbons for the last page (don't you love the Hungry Caterpillar fabric!)
Here are the fabrics I chose for the back- two from Roz of Squiltz thank you again Roz :)
And here it is all rolled up - I stitched velcro dots underneath the little flap to keep the book shut.
So if you are keen to make a busy book but are a little daunted about making heaps of pages then this is a great option! 
For more creative spaces, head on over here
Megan x

Wednesday, October 26, 2011

Sewing for beginners: Lesson two-a lavender sachet

Finally another beginners sewing tutorial- sorry it has taken so long! These lavender sachet's make lovely little gifts or a sweet thing to make for your little ones bed and they are a great way to use up any scraps of fabric you have.

You will need
  • Your chosen fabric- you could use the same fabric for the top and bottom of your sachet like mine or two different fabrics that complement each other.
  • Piece of card for template- you could use the same one as for the pin cushion if you made one.
  • Piece of ribbon for loop- mine is about 14 cm long. 
  • Button (optional)
  • Dried lavender- if you are lucky enough to have lots of lavender just pick some and put it in the hot water cupboard to dry-I think it takes about a week. We don't have a lot so I bought a bag from Trade me.  Markets are great places to find dried lavender too and also some health stores.
.

1. Make a template using a piece of card- mine is 17 cm by 12 cm.  Draw around it twice on your chosen fabric and cut out both pieces.
2. Place one of your pieces of fabric right side up. Fold your piece of ribbon in half and place it in the middle of the top of the fabric with the edges of the ribbon facing up and just over the top of the fabric - see pic above.
3. Place your second piece of fabric right side down on top of your other piece and pin where the ribbon is to keep it in place
4. Starting where the arrow is in the pic above, sew around your pieces, stopping roughly where the dot is above. This leaves a gap to fill your sachet.
5. Turn your sachet right sides out by pulling it through the gap.
6. Use a spoon or funnel to fill your sachet with lavender. I fill mine about half full to make it easy to top stitch around.
7. Starting just before the gap top stitch all the way around your sachet. This looks nice and closes the gap too without hand sewing - bonus!
8. If you would like to, stitch a button underneath the ribbon for decoration.
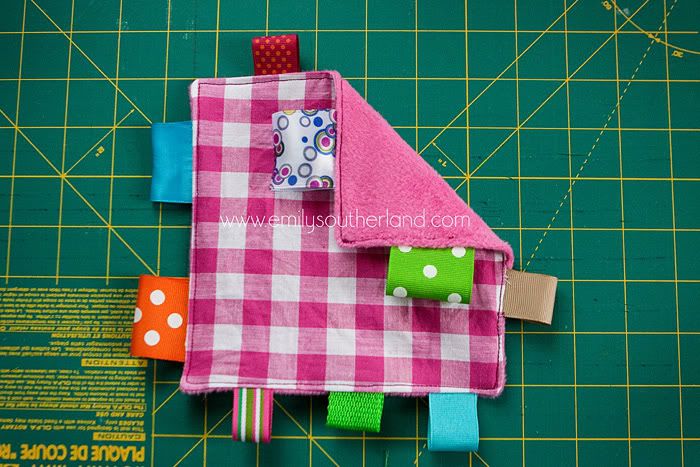
All done!  And here's an extra for experts- if you can make one of these then you can easily make a taggie toy- just cut more pieces of ribbon and place them around your fabric in the same way- 2 or 3 on each side, then sew in exactly the same way, leaving out the lavender stuffing step.  Use fabrics like satin on one side and fleece on the other - babies love those. Here's a great tutorial for a crinkle taggie toy if you would still like to see the instructions.
Photobucket
Next lesson- how to applique a store bought t-shirt or baby bodysuit- hopefully that won't take me as long to share!
Happy sewing,
Megan x

Thursday, October 20, 2011

A couple of baby shower games

My sister had her baby shower a few months ago now (she is now the proud mum of a baby boy so Jack has a boy cousin close in age which is great!) and I made a few games for it that I've been meaning to share here for a while now.  Both are nice and easy to prepare so they might come in handy if you've got a baby shower to organise soon.

The first one is a take on Pass the Parcel.  It's a great one to use as a bit of an ice breaker and to get to know everyone as well as hear a few stories from the guests. You wrap a little gift for the mum to be with the instruction "pass to the mum to be due to give birth on the ......." and then wrap layers with an instruction stuck to each layer - things like "pass to the person who had the longest labour", "pass to the person who went the most overdue" " pass to the person who has children closest in age" and others like "pass to the person who has the most brothers or sisters" or "pass to the person who was born overseas" to hopefully cover some of the people who don't have children so they don't feel left out!
You could stick a treat to each layer as well if you want.  I've made a google doc with the labels on it here (under the quiz questions and answers). You can use as many or few labels as you want the game to go for.
Amelie made some wrapping paper for me :)
I got the idea for this from when I was teaching- I used to play a pass the parcel game on the first day of term with things like "pass to the shortest/ tallest/ oldest/youngest person,  person with the most brothers/sisters/both, person with the longest hair, person with the youngest/oldest sibling etc- it was a great way to get to know the class. I've also done a version of it for a few hens nights- things like "pass the the person who ....has been married the longest/married the most recently/recently engaged/came from furtherest away to get here/known the bride- to -be the longest (other than mum/sister(s)!), has a funny or embarrassing story about the bride- to -be etc...

The other game is just a simple quiz I modified from a couple I found on the web. For this I just put everyone into pairs and gave them the question sheet which each pair filled in together and then I went through the answers at the end and gave a prize to the winning pair (you might want to have a few prizes in case there is more than one winning pair).  The sheet with the questions to give each pair is here and the sheet with the answers at the bottom is here


And if you've got a baby shower coming up here are a few gift ideas I've found on Felt ...
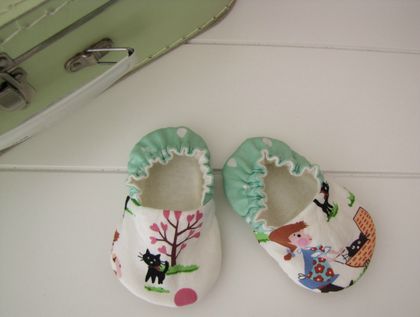
MissMollyCoddle Vintage Park Scene 0-6months shoes
Baby shoes Size 0-6 months from Miss Molly Coddle
Cheerful Chap in Yellow Rabbit
Cheerful chap in Yellow Rabbit from Little Minx
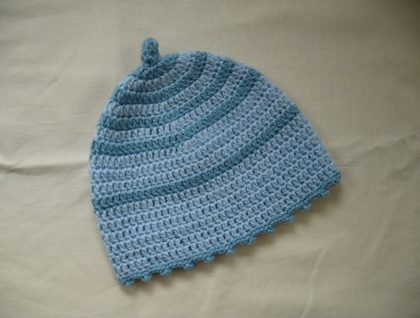
Baby hat - Blue stripes
Merino baby hat from Greenvalley Crafts
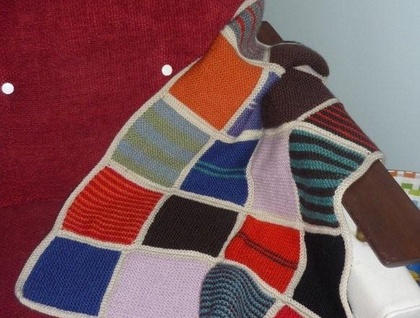
Peggy Square Baby Blanket
Peggy Square baby blanket from Peggy Square
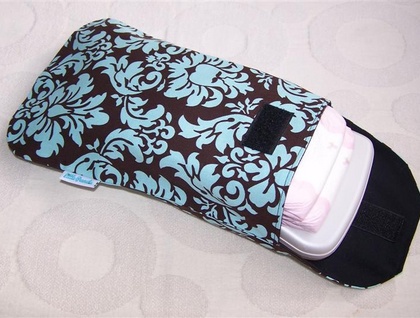
Grab 'n' Go Nappy Clutch - Spa Damask
Nappy clutch from Little Peanut

Yay for babies! And thanks again for the comments and advice on Jack getting started on solids on my facebook page- it was so helpful and reassuring. I have gone with the great advice of giving him finger food instead of pureed food for now- just rusks the last few days which he's been loving and tonight we gave him some roast chicken and he loved it- it was very funny watching him try to get it in his mouth! Am not even going to try pureed foods for a few more weeks now and have got a baby led weaning book from a friend too so he may just end up being a finger food baby which will be very different from the girls. Awesome to get advice so quickly from other mums that have been there done that with their babies:)
Megan x

Thursday, October 13, 2011

My creative space: lap quilts

Well it's been a while since I've been here but life has been pretty crazy lately (well no more than usual with 3 kiddies I guess) but I thought it was about time I wrote a 'my creative space' post as it feels like ages since I wrote one! Am feeling pretty sad at the moment about the terrible oil spill happening here in our beautiful Bay of Plenty  (local writer Jenny Rudd has written about it here)  but I'm going to share my quilts to take my mind off it for now.
I made these little lap quilts a while ago for the girls to snuggle under when watching TV or reading a book. They are without a doubt my most favourite thing I have made so far for the girls. They love their 'quilties' and drag them around the house all day using them for games and snuggles. And as my friend said- much better than dragging their entire duvet around the house! Seeing them cuddling them in bed at night makes my heart sing- funny how it is when you make something that they really love-  it is the best feeling :)
Lining up all their soft toys underneath their quilts -this took them aaaages - always a good thing ;)
They didn't take long to make - probably 2 hours tops for each one. I made a patchwork top then used some needled cotton for the inner and some printed flannel for the back. I followed this tutorial from Cat Taylor (the same one I used for Jack's baby playmat/blanket) which is really easy to follow.
Helping me lay out the pattern for the patchwork top
Will have to make a start on one for Jack next. Hope you're all having a good week and thanks for reading.
For more creative spaces head on over here...
Megan x
Related Posts with Thumbnails