Monday, March 30, 2015

A Lego Party

Hi everyone, here are the details of my daughter Stella's 6th birthday Lego Party we had last week. I chose to do an after school party as her birthday was on a Wednesday so we could do the whole birthday on the one day, rather than every other year where the party has been on a different day to the birthday. We had 12 guests plus our three kids so there were a lot of kids running around, I don't normally have this many kids but Stella has a lot of boy and girl friends so this bumps up the numbers quite a bit! So here are the details below if you are thinking of doing a lego party yourself- I tried to keep it as simple as possible...kids birthday parties are a lot of work and I have my other two kids birthdays in a few weeks. They aren't having parties like this though…Jack (nearly 4) is going to have one at an indoor playground place where they do everything (it'll be his first party). And Amelie (nearly 8) is going to have a French themed party but it will be small and 8 year old girls are a dream so I'm actually looking forward to that one!!

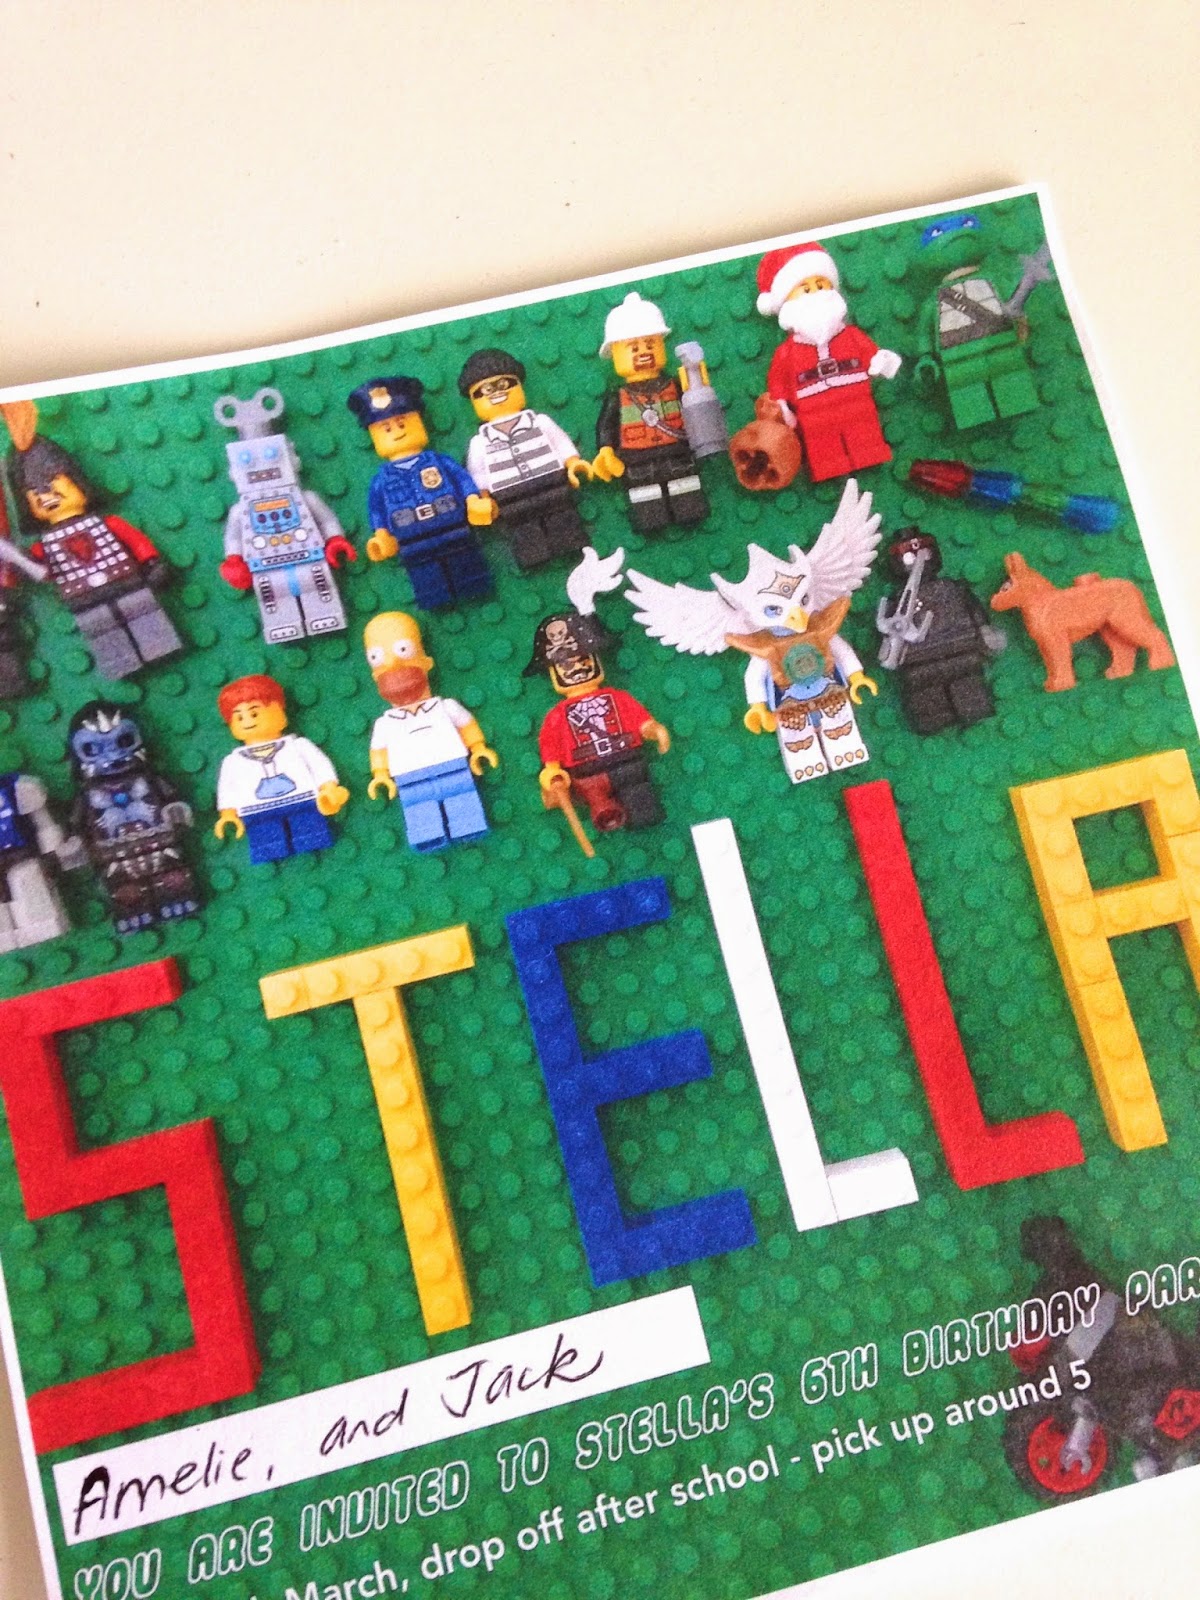
Invite: I got a lego base board and we spelt out Stella's name and arranged all of her favourite lego mini figures on it, then I took a photo of it and typed up the party info at the bottom (I found a free lego logo looking font 'Lego Thick' as I was going to do a different invite at first so I used this on part of the invite). 


Decorations:  I hung the birthday bunting that I made a few weeks ago (will share that soon)- I've been meaning to make some birthday bunting for ages that we can hang up for each of our birthdays- a fun tradition. Then I got photos of Stella right from newborn to now and used washi tape to make a line of them (they all loved this). And my friend lent me the cool lego storage head.  I also hung a few bright yellow balloons outside.
Food: Because there were so many kids coming I decided to use these Homebrand reusable containers (less than $1 each) and just put the food in them so they could eat outside.

 In each one I put a lego cookie that I'd made. I couldn't find a lego mini figure head cookie cutter from an NZ online store so I bought this one from Etsy). I used yellow fondant to ice them and a black edible icing pen for the face. 
I added fairy bread, grapes, rice crackers, some lego lollies from Crazy Candies

popcorn, and a few other sweets. Approximately one quarter of this food was actually eaten which I was surprised about as I though they'd all be starving after school!

Cake: I asked the amazing Shannon from TuiRose Cupcakes (Check out her Facebook Page at http://www.facebook.com/TuiRoseCupcakes) to make me some lego mini figures cake toppers after seeing some on Pinterest- isn't the detail on them incredible! Stella loved these :) I just ordered a birthday cake from New World this year as I wanted to make the party as easy as possible for me, so I added some lego lollies and the awesome toppers to my store bought cake.


Activities:  I organised two games to play- Pass the Parcel (Stella's favourite) and 'pin the head on the mini figure'. 
For each layer of pass the parcel I put one of these lego lollipops- I used yellow washi tape to cover the lollipop wrapper and drew a mini figure face on each one.
For the prize I found these lego pencil sharpeners on clearance at Warehouse Stationery (less than $3, and added a lego minifugure from the Warehouse, and a lego pen (I split a pack of 4). 
 

For the 'pin the head on the mini figure' game I was going to print out a free printable but that was going to cost a lot to print poster size, plus printing out the lego heads, especially as I needed two so I could split my big group into girls and boys, so I just bought some A0 size white card and some A0 yellow card instead, drew and painted the mini figures (in a bit of a rush!) and cut out the heads from he yellow card.


Goody bags: I love doing goody bags but I wanted to keep them simple and budget friendly this year so I found these bags for $1 each at a local dollar value type store and added the dots using the free paint chip cards from Bunnings (luckily I already had a circle hole punch)

In the bags I put another lego cookie, a balloon, a lego movie colouring sheet, and some lego lollies.

So there you go, some ideas for your own lego party…I have some more ideas on my Pinterest page here if you want to take a look…http://www.pinterest.com/megsmousehouse/lego/

Thanks for reading and have a great week :)
Megan

Tuesday, March 24, 2015

Easter treats

Last week I was asked by Countdown Supermarkets to come up with a couple of Easter baking treats to share. I do my weekly groceries shop at Countdown using their online delivery service (LOVE this service) and have done so for a few years now so it was great to be asked to share some ideas! I'm all for baking that is easy and that appeals to kids so I chose two recipes that will be handy for you to have-  it's always good to have an easy cupcake recipe for kids parties or celebrations/ holidays/ birthdays, and a basic sugar cookie recipe will always come in handy too. So my two recipes are:

Easter Egg Nest Chocolate Cupcakes
and
Easter Egg Cookies
Thanks to Countdown I was able to buy the goodies in this pic to make my two recipes- they have a huge range of Easter treats in store now, plus they always have a great range of baking and decorating products. 
I spotted so many great Easter eggs for the kids when I was in there the other day so I thought I'd share some of them with you as well...
All Blacks easter egg, Peter Rabbit, Lindt Pirate Bunny and Easter Egg, Fire Station easter egg box
Ferero Rocher Bunny (one for us mums :), Kinder Surprise Maxi egg with toy, Robin Edible Eggs (comes with pens that you can decorate the eggs with), Mr Men book and easter eggs
I also spotted these cut out bunnies - only $4 for 25 sheets of them which I'm going to use for my next kids craft class, and would also be ideal for teachers! Countdown also had some cute little buckets so I bought this mint one for our easter egg hunt.

So here are my recipes...

Easter Egg Cookies
Kids will love these as they can have fun decorating them using icing pens and cake decorations.


125g butter, softened
1/2 cup of caster sugar
1 egg
half a teaspoon of vanilla essence
1 cup plain flour
1 cup self raising flour
Icing pens ( I bought the box of glitter pens and the trio of chocolate icing pens)
Soft sugar pearl cake decorations
Pettinice ready to roll fondant icing
Water or glucose syrup

Preheat oven to 160 C or 140 C fan
Line two baking trays with baking paper
Cream the butter and sugar until light and fluffy
Add the eggs and vanilla and mix
Add the flours and fold in to form a dough
Place your dough on a piece of baking paper and add another piece of baking paper on top
Roll your dough to about 5mm thick
Using an easter egg shaped cookie cutter cut out eggs and place on the prepared baking trays
Re-roll dough and repeat until you've used all the dough
Bake for 10-15 minutes until golden
Cool on a wire rack
Roll out a chunk of the Pettinice icing as thin as possible and use the easter egg cookie cutter to again cut out egg shapes. Use either water (brush onto the back of the fondant eggs) or glucose syrup to stick the fondant egg to the cookie. This is optional- you could just leave the cookies as is to decorate.
Decorate using the icing pens and sprinkles


Easter Egg Nest Chocolate Cupcakes


These delicious chocolate treats are perfect for Easter and your kids will love the little nest of eggs!

Makes approx 18 medium sized cupcakes

1 and a half cups of Self Raising Flour
1 cup white sugar
2 tablespoons cocoa
1/2 cup of milk
2 eggs
125g butter, melted
1 tsp vanilla extract.

1. Preheat oven to 180oC conventional or 160oC fan-bake. 

2. Line cupcake tins with 18 cupcake cases
3. Melt butter. 
4. Put all ingredients in a bowl and beat on medium speed for five minutes
5. Spoon tablespoon size into muffin tins or cup cake cases.   I find an ice-cream scoop the perfect size to fill the cupcake cases- one big scoop per cupcake is enough.
Bake for approx 15 minutes or until cakes spring back lightly when touched- or check using skewer. Transfer to a wire rack and let cool.


Chocolate Buttercream Icing

100grams softened butter
2 cups Icing Sugar
1/4 cup cocoa powder
1 tablespoon hot water

1. Cream the butter until pale and fluffy
2. Beat in the icing sugar ( I use an electric beater) one cup at a time
3. Add the hot water if needed
4. Use an icing bag with icing tip (you can buy these at Countdown- look for 'disposable icing bags' - they come with different icing tips.) Cut the pointy part of the bag off (see pic) 
and place tip inside the bag and push it through the hole you've cut.  
Fill up the bag with the chocolate icing
5. Ice your cupcakes
6. Decorate using broken pieces of flake to make the nest, and add two mini eggs on top, or one mini creme egg

I hope you like these recipes - would love to hear if you make either or both of them! Countdown is going to help you with that by giving every mousehouse reader a $5 off voucher to use with your next online order! (just put the code in the box that says 'coupon code' at check out)

Here's the code : YUM

And check out Countdown's Pinterest Page for loads more delicious recipe ideas http://www.pinterest.com/countdownnz/ 
and for Easter recipes their "Eggscellent Easter" pin board is full of great ideas!  http://www.pinterest.com/countdownnz/eggscellent-easter/


Happy Easter!
Megan

Sunday, March 15, 2015

DIY Personalised Photo Art

If you would like to make your own personalised photo art for your child here's a quick 'how to'- (I'm writing how to do the ones with the writing down the side of the child but as long as your child wears a blank t-shirt you could follow these instructions to do one like Amelie's). These are such a great way of capturing your child's personality at a certain age, and looks fantastic framed and on the wall! These ones are A4 size but you could always do smaller or larger.
1. Take a photo of your child in front of a blank wall-  it doesn't have to be white as you can change the font colour so you can still see the words. You want room on one side of your child to type the words so when you take the photo make sure you have some blank space to the left or right of your child (i.e. don't take the photo with your child in the exact centre).
2. I use a Mac computer so I download my photo into iPhoto - you might like to play around with the exposure to brighten the photo background ( I forgot to do this with Jack's so I'll be reprinting it as the background has come out quite grey even though he was against a white wall).  
3. Now open up the application 'Pages' (or similar word processing application) 
4. Open a new document, add the photo from the 'media' tab onto your page and stretch it to make it as big as the page
5. Choose a font and colour and type the words down one side of your child. I use a separate text box for each sentence so I can play around with the size to fit it next to the photo.
Here are some sentence starters for you...

'who likes'
'who loves'
who plays'
'who needs
'who wants'
'who sings'
'who doesn't like'
'who says'
'who watches'
'who makes'
'who wants'
Any questions please ask, would love to hear if you make one!
Megan x

Related Posts with Thumbnails